Description
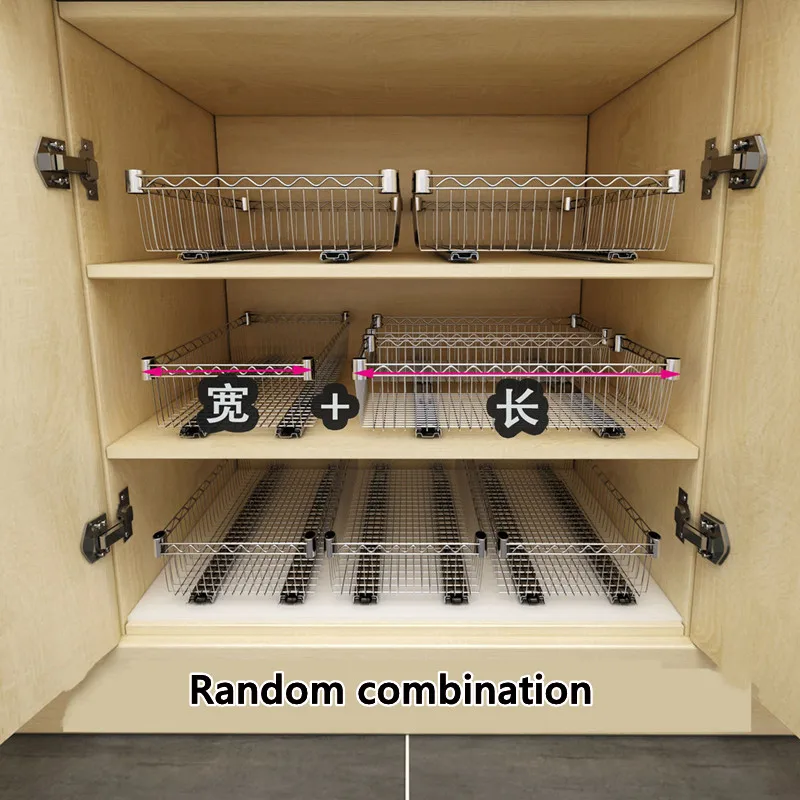
All are individual accessories, it is recommended to freely combine and purchase according to needs
CCTM pull basket series All pictures, text, sku, etc. of this product are original, please respect the results of others’ labor
Installation points:
1. Before installation, you need to compare the size and determine the position. You must first simulate the push-pull process to prevent the slide rail from being installed in the wrong direction.
2. Keep the slide rail and the fixed position on both sides parallel.
3. To use nail-free glue to fix the bracket, you need to use glue correctly according to the video we provide.
4. If you don’t want to use screws on the bottom slide rail, you can use nano double-sided tape, which is convenient for later disassembly and will not damage the cabinet.
1:Measure the height of the line
(The depth position matches the track hole)
2:After the gasket is aligned
(Line in the gasket hole)
3:Washer screwing
(Note: Don’t let the gasket move in the scented wire)
4:Bundled with cable piercing
Drag bottom gasket
(Be careful not to tie the wire tightly)
5:After tying the track
Pull out the track to tie the net basket (mesh)
(Note the cable tie)
6:After tying the net basket
Push-pull basket (mesh)
(Tighten the track after smooth pushing and pulling)
Finished
How to use nail-free glue:
1. Mark the location that needs to be installed
2. Wipe clean the walls and areas that need to be painted
3. Squeeze on the nail-free glue
4. Align the installation position and press vigorously
5. Pull out, pull out the thread with nail-free glue
6. Press back on the wall again. Fix with auxiliary stickers, wait 48 hours for the nail-free glue to dry, then you can use it, hang heavy object
Additional information
| Weight | 1 kg |
|---|---|
| Dimensions | 50 × 20 × 15 cm |
| Feature | Eco-Friendly, Stocked |
| Material | Metal |
| Use | Sundries |
| Model Number | Kitchen drawer pull basket |
| Brand Name | DEUAMO |
| Origin | Mainland China |
| CN | Fujian |
| Type | Storage Drawers |
| Feature 1 | Spice Drawer Organizer |
| Feature 2 | Acrylic Seasoning Bottle Storage Rack |
| Feature 3 | Under Desk Drawer |
| Feature 4 | Hidden Kitchen Supplies Storage |
| Feature 5 | Wardrobe renovation |
| Feature 6 | CCTM Pull basket series |






Reviews
There are no reviews yet.